A properly sealed garage door is essential for maintaining energy efficiency, keeping out unwanted pests, and protecting your garage from the elements. Over time, garage door seals can wear out, becoming less effective and allowing drafts, water, and debris to enter your space. Replacing your door seal is a straightforward task that can save you money on energy bills and extend the life of your garage. In this guide, we’ll walk you through the steps of replacing your door seal, offering tips and insights to ensure a successful installation.

Replacing Your Garage Door Seal
1. Understanding the Importance of a Seal
The door seal is a crucial component in protecting your garage and home. It serves multiple purposes, including:
- Energy Efficiency: A good seal prevents air leaks, keeping warm air in during the winter and cool air in during the summer, which can help reduce energy costs.
- Protection from Elements: It blocks rain, snow, dirt, and debris from entering the garage, keeping it clean and dry.
- Pest Control: A well-maintained seal prevents rodents, insects, and other pests from sneaking into your garage.
Given these benefits, regularly inspecting and replacing your garage door seal is essential for maintaining a functional and comfortable home environment.
2. Signs That It’s Time to Replace Your Door Seal
Before diving into the replacement process, it’s important to recognize when your door seal needs attention. Common signs include:
- Visible Gaps or Cracks: If you notice gaps or cracks along the edges of the door, it’s a clear sign that the seal is no longer effective.
- Water or Debris Inside the Garage: If you find water, dirt, or debris accumulating inside your garage near the door, the seal may be compromised.
- Increased Energy Bills: A sudden increase in heating or cooling costs could indicate that your garage door is not properly sealed, allowing air to escape.
If you observe any of these signs, it’s time to replace your garage door seal to ensure optimal performance and protection.
3. Choosing the Right Door Seal for Your Home
There are several types of door seals available, each designed for different door styles and climates. Selecting the best door seals for homes depends on your specific needs:
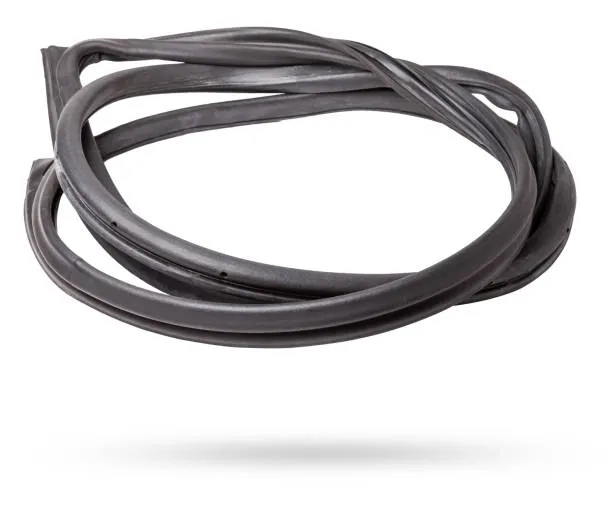
- Bottom Seals: These are the most common and are attached to the bottom of the garage door to prevent drafts, water, and pests from entering. Options include T-style, U-style, and bulb-style seals.
- Threshold Seals: Installed on the garage floor, threshold seals work in conjunction with bottom seals to provide an extra layer of protection.
- Weatherstripping: This type of seal is applied along the sides and top of the garage door frame to prevent air and moisture from entering.
Consider your garage door type, local climate, and specific needs when choosing a seal. This will ensure you select the most effective door seal installation for your home.

4. Gathering Your Tools and Materials
Before beginning the replacement process, make sure you have all the necessary tools and materials:
- New garage door seal
- Measuring tape
- Utility knife or scissors
- Flathead screwdriver
- Pliers
- Cleaning supplies (soap, water, and a scrub brush)
Having everything ready beforehand will streamline the process and help you achieve a successful installation.
5. Step-by-Step Guide to Replacing Your Garage Door Seal
Step 1: Measure and Purchase the Right Seal
Start by measuring the width of your garage door to determine the length of the seal you need. Add a few extra inches to your measurement to account for any adjustments. Purchase a new seal that fits your door’s specifications. Be sure to choose a high-quality seal that matches your door type and local weather conditions.
Step 2: Remove the Old Seal
Begin by opening your garage door to a comfortable working height. Use a flathead screwdriver or pliers to remove any nails, screws, or clips holding the old seal in place. Gently pull the seal away from the door, taking care not to damage the door’s surface. If the old seal is stuck, use the screwdriver to carefully pry it loose.
Step 3: Clean the Surface
Once the old seal is removed, thoroughly clean the area where the new seal will be installed. Use soap, water, and a scrub brush to remove dirt, debris, and old adhesive. A clean surface will ensure a better bond and a more effective seal. Allow the area to dry completely before proceeding to the next step.
Step 4: Install the New Seal
Unroll the new garage door seal and align it with the bottom edge of the door. Start at one end and press the seal firmly into the channel, making sure it fits snugly. Use a utility knife or scissors to trim any excess material. If the seal is a T-style or U-style, slide it into the track, ensuring it fits securely.
Step 5: Secure the Seal
Once the new seal is in place, use nails, screws, or clips to secure it to the door. Be sure to evenly space the fasteners to keep the seal firmly in place. If your new seal includes adhesive backing, press it firmly against the door to ensure a tight bond. Double-check that the seal is flush with the door and properly aligned.
Step 6: Test the Seal
After installing the new seal, close your garage door and inspect the edges to ensure the seal is functioning correctly. Look for any gaps or areas where the seal may not be fully secured. Make any necessary adjustments to ensure a tight, even seal along the entire edge of the door.
6. Additional Tips for Maintaining Your Garage Door Seal
Regular maintenance will help extend the life of your door seal and ensure it continues to protect your garage effectively:
- Inspect Regularly: Check your seal periodically for signs of wear and tear, such as cracks or gaps.
- Clean the Seal: Keep the seal clean by wiping it down with a damp cloth to remove dirt and debris.
- Replace as Needed: Don’t hesitate to replace the seal if it shows signs of significant wear or damage.
By following these tips, you can maintain a secure, energy-efficient garage for years to come.
7. DIY vs. Professional Installation
Replacing your seal can be a simple DIY project if you’re comfortable with basic tools and tasks. However, if you’re unsure or prefer not to handle it yourself, consider hiring a professional. A professional door seal installation ensures the job is done correctly and can provide additional peace of mind.

In conclusion, replacing your garage door seal is a straightforward process that can greatly enhance the comfort and efficiency of your home. By choosing the right seal and following these simple steps, you can protect your garage from the elements, pests, and energy loss. Whether you opt for a DIY approach or hire a professional, maintaining a proper seal is essential for a well-functioning garage. Inspired? Contact us today to learn more about garage door services!
Frequently Asked Questions
1. Why is it important to replace the seal on my garage door?
Replacing the seal on your garage door is crucial for maintaining energy efficiency, protecting against water and debris, and preventing pests from entering your garage. A good seal helps reduce drafts, keeps your garage clean and dry, and lowers energy bills by preventing air leaks.
2. How do I know if the seal on my garage door needs replacing?
You should consider replacing the seal on your garage door if you notice visible gaps or cracks, water or debris inside your garage near the door, or an increase in your energy bills. These signs indicate that your current seal is no longer effective and needs attention.
3. What types of seals are available for garage doors?
There are several types of seals for garage doors, including bottom seals (T-style, U-style, and bulb-style), threshold seals, and weatherstripping. Each type serves a specific purpose, such as preventing drafts, blocking water, and stopping pests. Choose a seal based on your specific needs and door type.
4. Can I replace the seal on my garage door myself?
Yes, replacing the seal on your garage door can be a simple DIY project if you’re comfortable using basic tools and following instructions. By following a step-by-step guide, you can successfully install a new seal and improve your garage’s efficiency. However, if you’re unsure, you may want to hire a professional.
5. What tools do I need to replace the seal on my garage door?
To replace the seal on your garage door, you’ll need a few basic tools: a measuring tape, utility knife or scissors, flathead screwdriver, pliers, and cleaning supplies. These tools will help you remove the old seal, clean the surface, and install the new seal effectively.
6. How often should I replace the seal on my garage door?
It’s a good idea to inspect the seal on your garage door regularly for signs of wear and tear, such as cracks or gaps. Depending on the quality of the seal and the environmental conditions, seals generally need replacement every few years. Replace the seal as soon as you notice any significant damage.
7. What are the benefits of hiring a professional to replace the seal on my garage door?
Hiring a professional ensures that the seal is installed correctly and securely. Professionals have the experience and tools necessary to handle any complications that might arise during the installation process. This can provide peace of mind, especially if you’re not comfortable doing it yourself.
